raspberry lemonade scones

Raspberry Lemonade SconesSometimes you mix ingredients together and the outcome is exactly what you imagined. Other times you make 3 batches of scones and cry over all the butter and raspberries that end up in the garbage disposal.

Had my man not bought me the giant container of raspberries we would no be looking at these delightful scones. (Had I not caught him eating the just enough raspberries I had left for a last scone attempt…well, I’ll put put it this way, the man still has his fingers.)

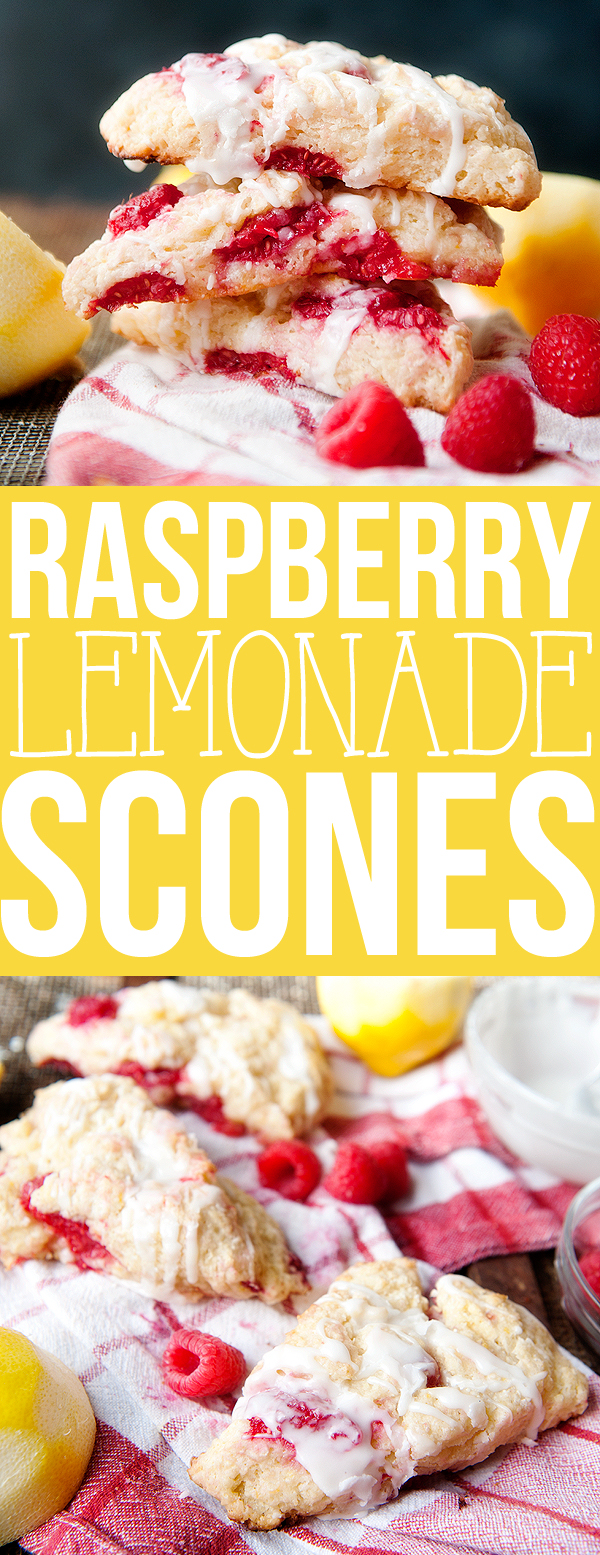
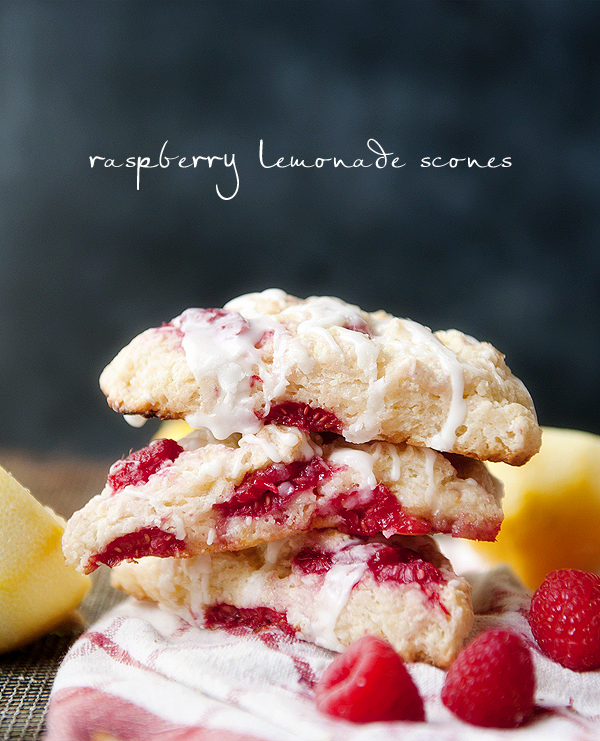
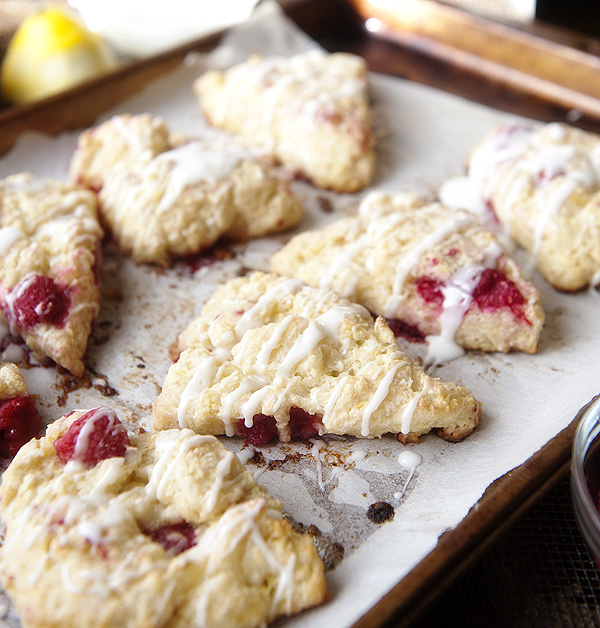
My first attempt I thought I would get cute and use San Pellegrino for the lemonade flavor. I have never baked with carbonation like that before. It was a complete disaster. The second go around I have no idea what happened. My best guess is I completely got a measurement wrong. The last one though, it was exactly what I was hoping for. Light, yet crispy on the edge scones filled with juicy raspberries and brought alive with the zing of lemon. These are iced coffee ready people.

Raspberry Lemonade Scones
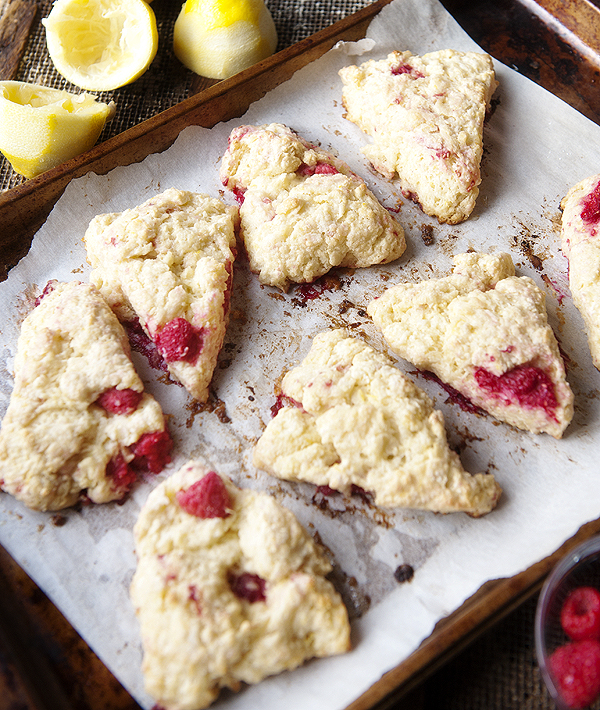
At first I thought the scones were kind of ugly but then I drizzled the glaze on them and they got all cute. Wish that’s all it took for us human folk. Can you imagine? Wake up. Drizzle. Done.

Raspberry Lemonade Scones
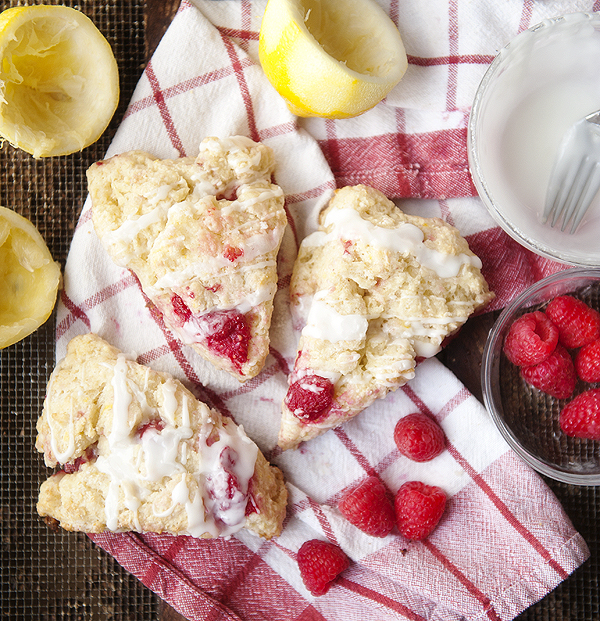
One thing that was extremely important to me is that these did not taste like raspberry with lemon scones…I wanted that lemonade flavor there. In doing this, I 86’d any vanilla I would typically use, and added more zest. But the true lemonade flavor comes from the glaze. It’s a thick, creamy lemon shake-up dream glaze. Placed on top of that raspberry scone sends it into a whole other world of goodness.

Raspberry Lemonade Scones Raspberry Lemonade SconesBright flavors are my thing right now, as they should being that we are more than halfway through March. Get ready for more lemon guys, and raspberries but I pretty much obsess other those year round.

Enjoy!

brandyjsig


raspberry lemonade scones
 
Prep time
Cook time
Total time
 
Serves: 8
Ingredients
  • 1 stick of unsalted butter frozen
  • ⅓cup granulated sugar
  • zest of 2 lemons
  • 2cups all purpose flour
  • 1½tsp baking powder
  • ¼tsp kosher salt
  • 1 large egg
  • ½cup greek or plain yogurt (do not use fat free)
  • 2tbsp freshly squeezed lemon juice
  • ⅔cup fresh raspberries
  • for the glaze:
  • ⅓cup powdered sugar
  • 1tbsp lemon juice (more for adjusting)
Instructions
  1. Preheat oven 400ºF. Line a baking sheet with parchment paper.
  2. Grate the frozen butter on a large grate and place in small bowl back in freezer until ready to use.
  3. Place the sugar and lemon zest in a medium bowl and rub together with fingers. Add flour, baking powder and kosher salt and whisk together.
  4. In another medium bowl whisk together egg, yogurt, lemon juice and grated butter until well blended. Add to dry mixture and gently combine with a spatula until just incorporated it. It should have an almost fall apart, crumbly look to it. You want to stop mixing before all the flour disappears. Very important not to over mix.
  5. Add the raspberries and very gently fold them in. They can easily break but don't worry if they do. Just be as gentle as possible.
  6. Dump the dough onto the prepared baking sheet and form into a 7" to 8" disk. If dough is too sticky add a little flour to your hands. Not too much as this can make the scones tough. Cut the disk into 8 wedges and arrange evenly on baking sheet.
  7. Bake to 12 to 15 minutes our until scones begin to turn golden. Allow to cool on sheet completely.
  8. While scones are baking, make the glaze by combining the powdered sugar and lemon juice. You want it to be a consistency where if you pull up a fork and drizzle the drizzle stays for a bit before disappearing into the remaining glaze in bowl. Add more powdered sugar if too thin, more juice if too thick.
  9. Once scones are cool drizzle the glaze on top and devour. Best ate day of but can keep in airtight contain for up to 2 days.
Raspberry Lemonade Scones
Posted in breakfast, brunch, recipes, something sweet | Tagged | Leave a comment

hb salon (and a 3-way braid)

When talent, creativity and drive combine magical things happen. Our small town has seen quite a few magic makers taking the leap in recent years, with one of them being my gorgeous friend Alex.

HB Salon opened not too long ago. A dream that I know Alex has had for many, many years. Before I ever met her I would hear people say “She will do it someday. She’s a doer.” They could not have been more right. Not only did she “do it”, she knocked it out of the park. Took a small, not so lovely space, and transformed it into a swanky, intimate setting for hair stylist and her client.

Every corner of the salon has a little piece of Alex tucked away in it…with the touches from her grandmother (the sunburst clock and quote) being my absolute favorite:

HB Salon | Van Wert, OH

(So good right? Gosh I love brave people with big dreams!)

Of course I couldn’t visit Alex without stealing a hair tutorial from her. With help from another pretty friend, Siobhan, here is a 3-way braid:

First, part your hair to the side and take small section from the front. Next dutch braid it all the way to the end. Either by holding onto the end, or by securing the low bottom with an elastic, begin “pulling” the braid to give it a fuller, larger look. Pull from bottom to top, messy is good here. Once braid is nice and full secure the bottom with an elastic band.

3-Way BraidNow take a small section behind the dutch braid and do the same as above except with a classic french braid. Again, imperfection is okay here. In fact, it’s recommended!

3-Way BraidWith a 3rd section, directly behind the french braid, get your fishtail braid on. Do the same as the previous two braids as far as plumping and messing up that braid. When all braids are full and secured with elastics, grab some bobby pins and secure the braids in a swooping formation, around the back of your head. How far you will swoop over depends on your hair length. Siobhan has medium long hair and her swoop went a little past the back center.

3-Way BraidIt’s sort of like a casual half crown with lots of fabulous textures:3-Way Braid 3-Way BraidTo keep it on the simple side you can forgo the bobby pinning and simply do a loose braid with the 3 “tails” of the 3 different braids:

3-Way BraidThank you to Alex and Siobhan for helping me out on this fantastic post! And one more big CONGRATS to Alex and HB Salon. A new gem in our humble little town. We are lucky to have as many as we do.

[And hey guys, if you want more from Alex please let me know! I wouldn’t mind bugging her again!]

xoxo,

brandyjsig


If you are in the area (Van Wert, OH – near Lima, OH and Fort Wayne, IN) and would like to schedule an appt you can do so by calling 419.910.9424. You can also see what the girls are up to at HB on Insta: @salonhb

HB Salon | Van Wert, OHAlex Giessler & Bri Wyse of HB Salon

Posted in beauty, diy, hair | Tagged | 2 Comments

green is good

It has been rainy here the last couple of days…which I sort of love. Not that I am ready to move to Seattle or anything, but a day or two of mother nature’s melancholy is good with me.

Winter was sort of an awesome let down. It never truly “wintered” as in we never really got the kind of snow we have grown accustom to. When Timehop reminds me how bitterly cold it was the last few years however, I am more than happy to forego the snow.

That said I am ready for a legit season. Spring is suppose to be a mix of sunshine and rain. When we are gifted an honest to goodness dose of it I declare Spring as my favorite season.

Plus without rain when we would ever get to wear our cute wellies and carry the adorable umbrellas?

Hunter Boot LookI rarely wear that trench, and there is really no reason why. If there was a reason to drag it out of the closet it would be St Patrick’s week. That’s right, it’s a week long holiday. Come on guys, I already saw you celebrating this weekend on social media. Well, those of you without kids or the ones who had sitters.

Hunter Boot Look Hunter Boot LookYou cannot take yourself too seriously when you have to edit images of yourself. Sometimes I am horrified but most of the time I just laugh. The image above I am all “la dee dah…the rain is awesome!” and below I’m like “Touch my umbrella and die.”

I surely hope I don’t have a resting bitch face because that is pure evil right there.

green_coat_4||WEARING||green trench similar/denim shirt similar/H&M jeans/Hunter boots/umbrella

What are you wearing in green this week?

xoxo,

brandyjsig

Posted in holidays, outfits, St Patrick's Day, style | Tagged | Leave a comment

st patrick’s day recipes

Even though I am not Irish, not even a little bit, I can’t help but love St Patrick’s Day and all the fun that comes along with it. Of course the way I celebrate this holiday has changed quite dramatically over the years [I no longer smell like Guinness on the 18th] but I still find a way to partake, even if it’s only with my coffee.

I’ve gathered some of the blog’s past recipes featuring either Guinness or Irish cream or both! My personal favorite is the traditional Irish coffee, with the stout ice cream being a close second. Hopefully there is something here that suits your fancy and you go Irish this week: 031116_st_patricks_recipes1Coffee Stout Ice Cream with Chocolate Covered Pretzels/2Irish Cream Mocha Thumbprints/3Traditional Irish Coffee/4Guinness Chocolate Cake with Irish Cream Buttercream/5Homemade Irish Cream/6Boozy Guinness Pretzel Truffles

There are an alarming amount of Irish cream recipes on this blog… Some may see that as a bad thing but I am thinking job well done PPJ, job well done.

Have a wonderful St Patrick’s Day!

brandyjsig

Posted in holidays, recipes, St Patrick's Day | Tagged | Leave a comment

easy ways to tulip

Easy Ways to Arrange TulipsTulips are undoubtedly my favorite flower on the planet. As a child they were the signal that my birthday was approaching. Later in life they simply meant a new season was on it’s way…and I love that change.

But the real seal the deal moment came in the spring of 2004. Sticky was living in Madison, WI and the tulips had already bloomed around the capital. It was gorgeous, made even more so by winter’s one last snowfall. Every single tulip was filled with powdered magic. I realize it was not great for their longevity, but I told Sticky it was one of the prettiest things I had ever witnessed. My birthday came less than a month later and the boy “who didn’t want a girlfriend” sent this girl a vase of tulips. I’ve received many more since then but I’ll never forget those 2004 blooms.

Now that you know the lovey dovey part of why I am obsessed with tulips, I want to also let you in on a little secret: They are by far the easiest flowers to arrange and display in your home. Here’s why:

  • They practically arrange themselves. Especially if you cut them so that 2/3 of their length is in the vase and 1/3 hangs out.
  • They are delicate looking yet very sturdy. You can rearrange and fuss with them without needing wire or tape.
  • Little trimming if any is needed. Their leaves are beautiful and add to the arrangement in most cases.
  • Easy care. Room temp water, just barely covering the ends (they don’t like to soak in high water). To get the most out of them trim the ends slightly and replace water everyday.

Now the fun part. 3 super easy ways to arrange your gorgeous tulips:

  1. Take a bunch of tulips (I bought mine at a grocery store) and trim them so that 2/3 of the length will be in cylinder vase, with 1/3 hanging out of vase. Remove one leaf from a stem and wrap around the middle 1/3 of stems. Tie ribbon or twine around that to hold in place. Put flowers in vase with a some water and enjoy!

Easy Ways to Arrange Tulips Easy Ways to Arrange Tulips2. Perfect for when you find one lonely tulip bloomed. Simply cut so that entire length of tulip will fit in jar. Add a little water and enjoy! A line of these across a table would gorgeous. This guy is making my kitchen window happy all by himself though.

Easy Ways to Arrange Tulips3. Find a jar that is not taller than and will fit inside of another vase or container (that is clear). Fill the space in between with your candy, rocks. or anything else that will fit in the space. Trim 2 bunches of tulips to fit the interior jar to the 2/3 in, 1/3 out length. Alternate colors when placing in jar for a more distributed look. Use leaves to cover up any of the top of the jar showing. Pour a little water in the jar with the tulips. This particular version is perfect for Easter. You could also fill with jelly beans or even Peeps!

Easy Ways to Arrange Tulips Easy Ways to Arrange TulipsThere you have it! 3 easy ways to enjoy tulips. Next time you are at the grocery grab a bunch and put some happiness in a vase. It is practically spring after all.

xoxo,

brandyjsig

Posted in abode, decor, Easter, garden | Tagged | Leave a comment