diy banana oatmeal mask

DIY Banana Oatmeal MaskBananas and oatmeal are staples in our home as I am sure they are in many others. Very few breakfasts go by without a nanner or bowl of oats being involved. What you may not know about these kitchen commoners is that they also make for a fantastic face mask. All it takes is a few whirls in the grinder combined with a little mashing and you have yourself a mini beauty treatment right at home.
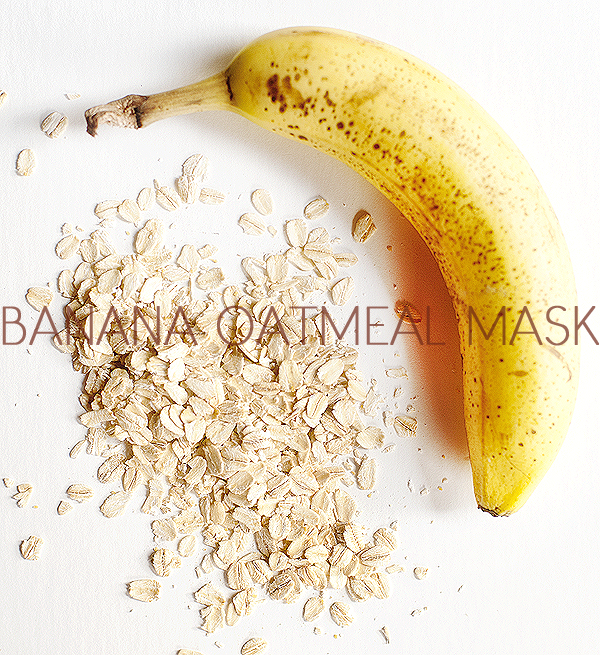
DIY Banana Oatmeal MaskYou are gonna need…

  • 1/2 of a banana
  • 1/4 cup oatmeal
  • 1tbsp whole fat yogurt (optional)
  • 1tbsp honey (optional)
  • coffee grinder

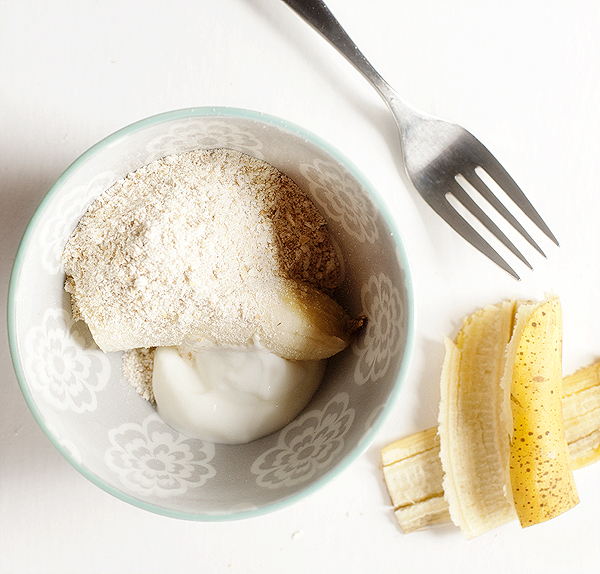
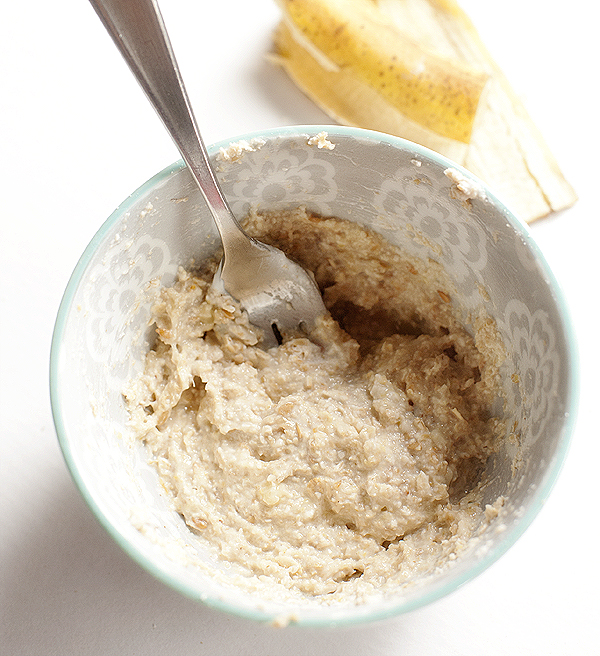
Place peeled banana in a bowl and mash with fork. Place oatmeal in a coffee grinder (the one that you do not use to grind coffee preferably – if you do not have a grinder leave whole). Pulse a few times until ground. Add to banana along with yogurt and honey if using. Mix until well combined. Apply to a clean, dry face quite liberally.* Leave mask on for 20 minutes. Rinse with cold water and moisturize if desired.

*Due to allergies be sure to test a small patch of skin before trying any at home skin treatments.

DIY Banana Oatmeal MaskThe bananas are a natural astringent while the oatmeal does double duty of astringent and exfoliater. I put my mask in the fridge for 10 minutes before applying. This makes for a refreshing “cooling effect”, especially when first applied. I love this mask for it’s clearing power and the smoothness it adds to my tired skin after a very long day.

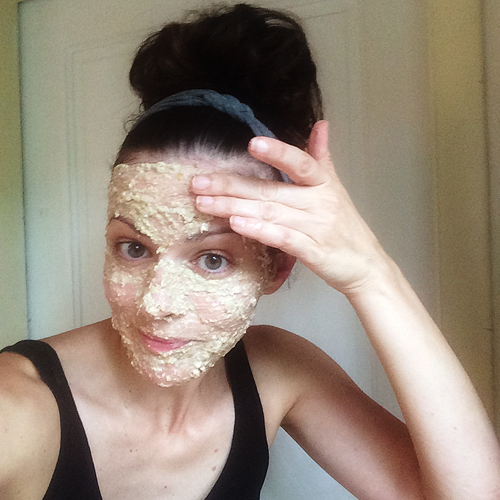
Someone once asked me why I didn’t post pics of me in my homemade masks. I’m not sure why…but it did get me thinking that you guys deserve the proof that I have indeed rubbed mashed banana all over my face.

So here is a little proof from me to you:

DIY Banana Oatmeal MaskBing: “So uh, what the heck is on your face and can I eat it?”

DIY Banana Oatmeal Mask

The good news is he actually can eat it. Beauty treatment and a snack all in one. That’s getting it done.

xo,

brandyjsig

Posted in beauty, diy, skin | Tagged | 1 Comment

denim and destroyed

Remember my friend Johanna? You know, the hot girl who can wear the crap out of a pair of jeans? More specifically a pair of destroyed jeans?

Well, it doesn’t matter if it’s on a model, a stranger or someone I know…every time I spy a pair of purposely beat up denim I think Johanna. I swear when the girl was born a fashion ferry flew into the hospital room and beat her over the head with a “wear the hell out of edgy denim” wand. Ripped jeans + Johanna = Fashion Bliss

Knowing Johanna the way that I do though, she would want the rest of the world to experience the wonderfulness of torn denim…and I couldn’t agree with her more. They are definitely her style – but she does it in such a sophisticated, updated way that reminds me they can be everyone’s style as long as you own the right pair. Fit is key, as it is with every pair of jeans. Hole placement and the amount of destruction is important too.

If you shy away from this trend because you think you are “too old”, “too thick”, “too conservative”, “too whatever” I urge you to try on a few pairs. You may be surprised how much you like them!

072715_destroyed_jeans1AEO Denim X Skinny Jean – great ease you into option with it’s classic skinny fit and light destruction. Especially love the added tear by the pocket./2Forever 21 Crochet-Patch Boyfriend Jeans – personally, I prefer a boyfriend fit on the destroyed side. This one is a nice price with a little girlie touch underneath those rips./3ASOS Ridley Black Skinny Jeans – two huge things are going for this pair. First of all, they are black which means they are naturally slimming (who doesn’t want that?). Secondly, only the knees are “busted” making them on trend yet keeping chic at the same time./4Only Regular Skinny Jeans – because I didn’t want to leave out my favorite denim color. While I do not own a pair of destroyed white jeans I do lust after them. Love how the rips on these are not so much open holes as the are rips with threads connecting each side. Perfect for the bright white shade./5AE Hi-Rise Boho Flare – 2 weeks in a row now I have been pumping the flares. (Clearly there is some determination on my part that you need a pair in your closet.) AE has always done denim, especially “worn” denim, well. These are no exception and completely on trend with the oh so groovy vibe going on in fashion.

Which is your favorite pair of destructed denim?

xo,

brandyjsig

Posted in style, trends | Tagged | Leave a comment

white wine vodka lemonade chiller

White Wine Vodka Lemonade ChillerI don’t know about the rest of you but T.G.I friggin’ F! This has been an especially long week. One that calls for not just one cocktail but a whole pitcher. Sure you could simply open a bottle of wine and call it good enough…but then you would be missing out on the amazingness of this beverage. And that would be sad. Let’s not be sad, it is the weekend after all.

White Wine Vodka Lemonade ChillerThis concoction was inspired by last year’s Raspberry Beer Cocktail – I wanted something for Bingham’s party that was universally pleasing to most and not too sweet. We swapped the beer out for wine and upped the vodka a tad. Blueberries were added because Bing loves them and bonus, they make things pretty. To be frank I wasn’t sure how it would taste but I figured wine, lemonade, vodka…how could that not taste good?

It doesn’t taste good….it tastes really, really, really good.

White Wine Vodka Lemonade Chiller White Wine Vodka Lemonade ChillerTo keep your drink from being watered down you will want to have all ingredients chilled before mixing. You can also freeze your fruit if you are using for a garnish. If you are really concerned about the melting ice, freeze some of the lemonade concentrate into cubes to mix with your regular ice. That would involve some pre-planning of course, but worth it if you are a well prepared person. (That would not be me, at least not in this lifetime.)

White Wine Vodka Lemonade ChillerGo find yourself a porch, a summer breeze and good company….and don’t forget this cocktail.

Cheers to the weekend!

brandyjsig


white wine vodka lemonade chiller
 
Prep time
Total time
 
Serves: 8servings
Ingredients
  • 1 12oz canister of frozen lemonade concentrate, thawed
  • 1 bottle dry white wine, chilled
  • 1cup vodka
  • cold club soda
  • frozen sliced lemons and blueberries for garnish (optional)
Instructions
  1. Fill a large pitcher ⅓ of the way with ice. Pour lemonade concentrate, white wine and vodka in and stir. Top with club soda (and lemon slices/blueberries if you want).
  2. Fill glasses with ice and pour in the yumminess. Garnish with more lemons and blueberries (optional). Enjoy!


Posted in cheers!, recipes | Tagged | 1 Comment

shrimp po’ boys (lightened up)

lightened up shrimp po' boysI have talked before about my love for an Eating Well cookbook that my mom gifted me  all the way back in 2010. It is to this day one of our favorite books to pull recipes from with this sandwich being at the top of our list.

The first time we tried this sandwich I’d be lying if I said there was no skepticism. We love po’boys and have never heard, let alone ate one that did not contain fried seafood of some sort. After one bite we forgot all about those reservations. This is every bit as good as the fried version with far less guilt.

lightened up shrimp po' boysNow if you really think about it the reason sandwiches are so darn good can be boiled down into 1 word – layers. To be more precise I am talking about all the textures and flavors you are sinking your teeth into with every single bite. Yeah, sandwiches are legit. Especially this particular one.

lightened up shrimp po' boysRegardless of Sticky’s constant request it has been quite some time since I have made this recipe. I am going to blame that on knowing my 4 year old wouldn’t touch shrimp…or cabbage, or tomatoes, or onion. (She’d eat the bread though!) In all fairness this sandwich is ridiculously easy to make – in fact I had forgotten how quickly it all comes together until I finally made it again the other night. I am thinking on those evenings when I don’t want to play the “you have to take 4 bites” game there can be some mac-n-cheese on the stove while these sandwiches are assembled. Sounds like a win-win for everyone in the family…not to mention a peaceful meal at the dinner table.

lightened up shrimp po' boys lightened up shrimp po' boysBeing that this is a sandwich I encourage you to mix things up as you please. I happen to love the layers of flavor the original recipe calls for (only added a bit more seasoning). I could definitely see extra spice, pickle or herbs being a nice touch though. What you don’t want to do is skip out on the toasting of your bun. The crunchy texture sets the scene for a sandwich full of nothing but delicious. It wouldn’t be the same without it. So don’t skip it. Ever. I’ll know if you do…

Enjoy!

brandyjsig


shrimp po' boy (lightened up)
 
Prep time
Cook time
Total time
 
Author:
Serves: 2
Ingredients
  • 1cup shredded red cabbage
  • 1tbsp dill pickle relish
  • 1tbsp mayonnaise
  • 2tbsp plain yogurt
  • ¼tsp red pepper flake
  • salt&pepper to taste
  • 12 to 16 peeled and deveined shrimp (depends on size as to how many you will need)
  • 2tsp olive oil
  • 1tsp chili powder
  • ½tsp paprika
  • salt&pepper
  • 2 whole-wheat hot dog or hoagie buns
  • 1 thinly sliced small tomato
  • ½ thinly slice small red onion
Instructions
  1. Preheat grill pan over medium high heat.
  2. Place cabbage, relish, mayo, yogurt & red pepper flake in bowl and combine. Season with salt and pepper to taste.
  3. Place shrimp in another boil and toss with oil, chili powder, paprika and a pinch of salt and pepper.
  4. Place buns on grill pan and toast on both sides. Place shrimp on grill pan and grill each side for a couple of minutes or until shrimp is curled and opaque pink. (Be careful not to overcook!)
  5. Assemble sandwiches by placing tomato slices on one side and onion on the other. Top with cabbage slaw and top with half of shrimp. Repeat with other bun and serve.


Posted in healthy eats, recipes, seafood, what's cooking | Tagged | Leave a comment

frozen chocolate covered blueberries with zest

Chocolate Covered BlueberriesIt’s that time of year again when our local grocer has 5lbs of fresh, plump blueberries at a price that cannot be beat. Sticky decided we needed 30lbs this year – sounds like a lot but considering our kids could live off blueberries and only blueberries it felt like the appropriate amount. Besides, these little buggers freeze like a dream which puts them in the “can never have too many” category. Especially since our entire crew loves to eat them frozen.

Being that we had so many frozen blueberries on hand I thought why not coat them with something. At first I was going to look up the yogurt dipped, ahem…healthier, version. But then I remembered having white and dark chocolate in the cupboard and thought better of the original plan. Of course I couldn’t simply roll my berries in chocolate and post it. “Hey, melt some chocolate, throw a berry in and voilà – a recipe!”…really impressive Brand, right?!  No, there needed to be more. An ingredient that would take these guys from simple to extraordinary.

Chocolate covered blueberries – say hello to zest. Lemon and lime to be exact.

Chocolate Covered Blueberries Chocolate Covered BlueberriesI started with white chocolate which I felt would pair better with the lemon zest. The tiny mound of yellow shred not only gives amazing flavor but looks oh so fancy. This is something you could make with your kids and then serve to your boss. Being that I am my own boss I happily shoved at least 10 of these in my mouth before they even made it to the freezer.

Chocolate Covered Blueberries Chocolate Covered BlueberriesNext Jettie and I did the dark chocolate – both of our favorites. She wasn’t so sure about the “green stuff” we were putting on top but in the end she gave it 2 thumbs up. Me, well, I am not sure why I have not been eating dark chocolate with lime zest in all my years…but I am sure that I will now never stop. Holy YUM!

Chocolate Covered Blueberries Chocolate Covered BlueberriesYou can coat them individually like I have or do as “mounds” and have clusters of chocolate covered goodness. As for the zest feel free to play around. Orange or even grapefruit would be amazing. You could go crazy with coarse sea salt or crushed nuts as well. What you can’t do is not try these. They are the best way to quench a sweet tooth in these hot summer days. (Who I am kidding, I would totally eat my weight in these during the winter too!)

Enjoy!

brandyjsig


frozen chocolate covered blueberries with zesty
 
Ingredients
  • 4 oz white or dark chocolate for melting
  • 2 cups frozen blueberries
  • zest of one lemon or lime
Instructions
  1. Line a baking sheet with parchment paper. Melt chocolate in a double broiler.
  2. Dip blueberries with a fork or small spoon one at a time into melted chocolate, coat completely with chocolate and set on prepared sheet. Repeat until you have coated 6 berries. Top with chosen zest while still warm. Start again with the next 6 frozen berries.
  3. Once all berries are coated and topped with zest pop in freezer for 1 hour. At this point you can take off sheet and store in an airtight container in freezer. Let set 5 minutes at room temperature before enjoying.

Frozen Chocolate Dipped Blueberries with Zest
Posted in Easy Freezy, recipes, something sweet | Tagged | 1 Comment