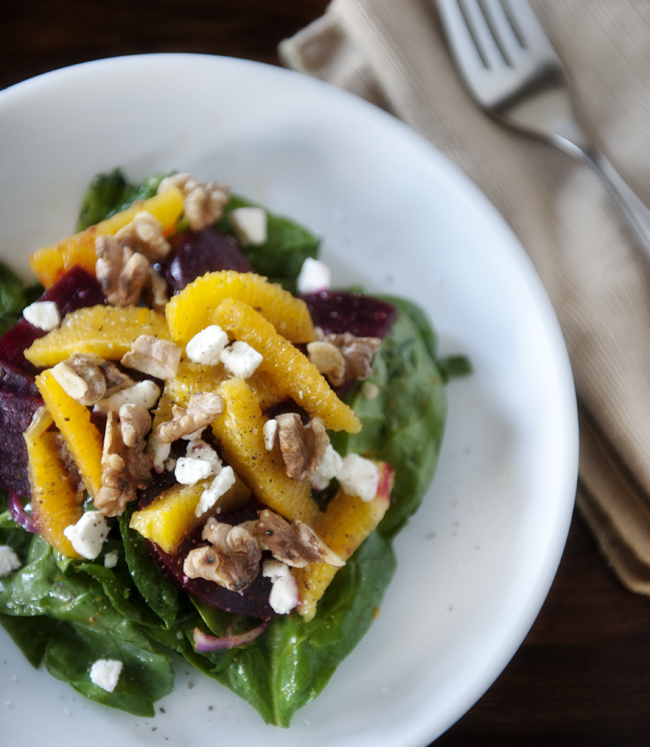
Waxing is a method of hair removal that some people will swear upon while for others, the word “waxing” alone has them running and screaming in the other direction. There are so many waxing kits sold in stores that promise perfect results when in reality most of them are not so friendly and don’t deliver. The reality of getting into the salon every time you feel a little fuzzy is slim, let’s face it.. we’re busy and it can get really expensive! Recently, I’ve decided I LOVE waxing and it makes life a little easier, as plucking hair by hair can be tedious and time-consuming. I have for you a DIY honey based wax recipe as well as steps to complete an easy eyebrow hair removal!

Here is what you’ll need.
Home-made wax:
- 1 cup sugar
- 1 cup honey
- 1/2 of a large lemon
Items needed for hair removal:
- baking powder
- cotton fabric cut into strips (any scrap cotton fabric you may have will do the trick!)
- wooden sticks
- home-made honey wax
To make the wax:
- Heat one cup of sugar in a saucepan on low, stirring until the sugar starts bubbling.
- Add one cup of honey and the juice of half a large lemon to the sugar.
- Keep stirring, mixing well.
- The wax should take on a golden-yellow color.
- Transfer the wax to a heat proof bowl, jar, etc. (whatever you want to store it in that will be safe to reheat when needed.)
- Let it cool. (slightly)
How to wax your eyebrow (thanks for trusting me with those brows Shan!):

Start by fully cleansing the area that will have hair removed.
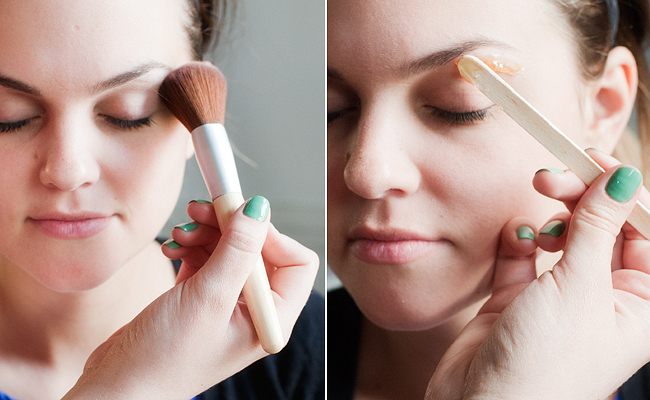
Next you are going to dust the area with baking powder. This absorbs any moisture and acts as a barrier between your skin and the wax.
Before putting the hot wax on your skin, test it to make sure you aren’t going to have 3rd degree burns, as that would not look very nice.
Apply the wax in the direction of the hair with the wooden stick. Be very careful to not get it on hairs you wish to keep!
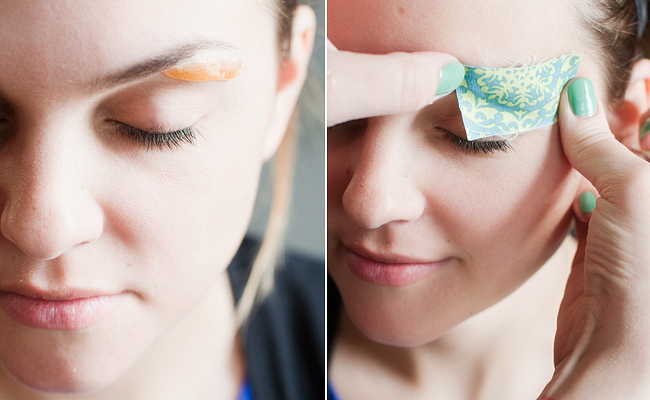
You will then take your fancy waxing strip and place it over the wax, again in the direction of hair growth smooth the fabric over the area.

Let the wax cool down slightly allowing for better grip of those unwanted hairs. With one hand pull the skin taught and with the other take hold of the end of the waxing strip. (At this point I usually take a deep breathe in and count to three, werid..but for me it helps ease the ripping of hairs out). Quickly, against the direction of hair growth, pull the strip off.

A clean, well-defined brow! If there is any sticky residue left just take a warm wash cloth and it will dissolve instantly.

* Not to be confused with “Brandy J”, Brandy is Shan’s talented big sis who we are thrilled to have stopping in from time to time with product and beauty advice. To learn a little more about Brandy and other “Guest Janes” check out the About Us page.

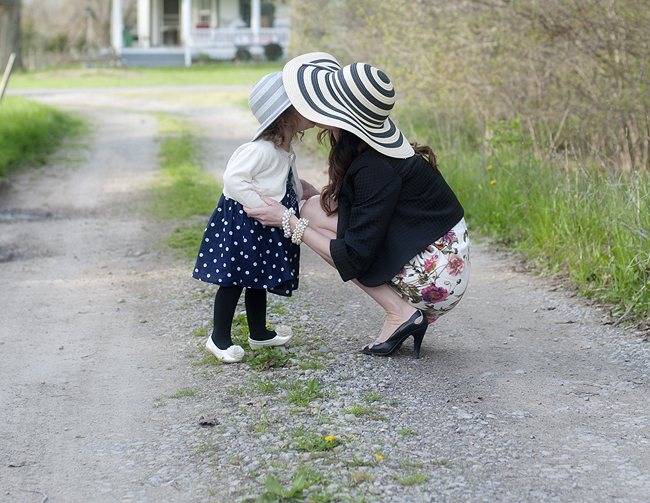
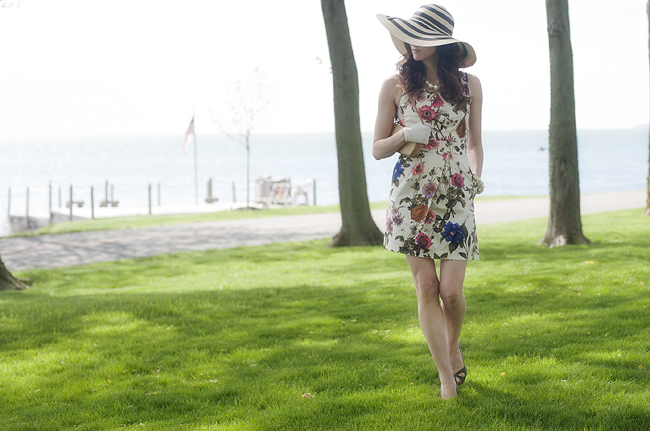 When it comes to being festive you could say that I am the opposite of a party pooper. If there is a theme I’m all over it and enjoy every phase of putting my outfit together. We began celebrating Derby Day a few years ago and I am in shock this date has not been marked on my calendar until now. Pretty dresses, lady heels and you get to wear a giant hat – that is ensemble paradise in my book. This year I was prepared early (so very not like me) with a hat purchased on clearance last August and the same pearls and gloves I wear every derby. Now all I needed was a dress. Simple enough especially when I spied this proper floral number on a whim. Demure, under $30 and it has pockets – could not be more perfect. Tempted to rock it for Mother’s Day as well (minus the hat I think).

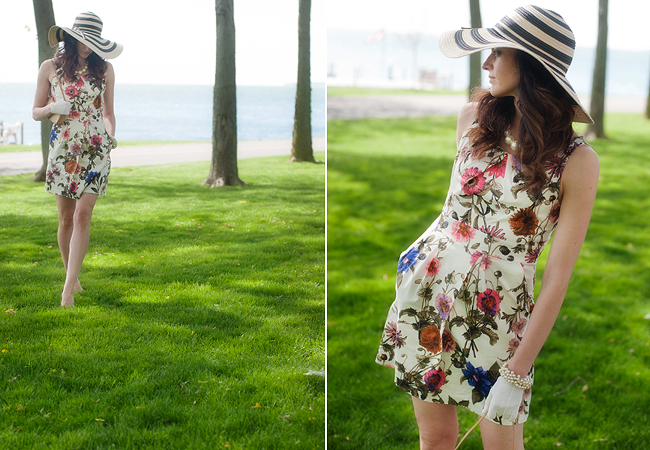 |WEARING| floral dress similar (the actual dress is from Forever 21 but unfortunately is no longer available online – this may still be at your local store though)/stripe hat similar/pearl necklace similar/pearl bracelet similar/lady gloves from an antique store/shoes similar/purse similar