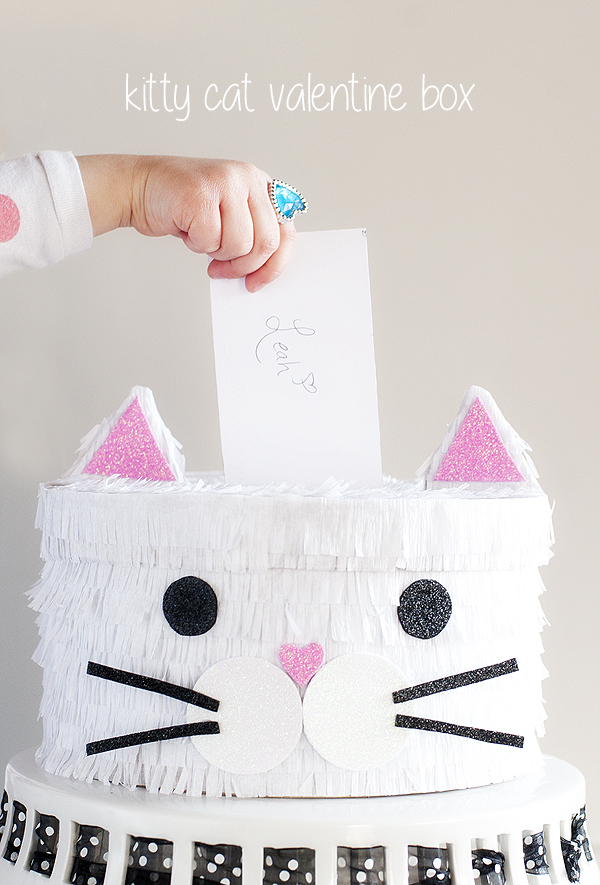
 One of my favorite childhood memories was making what cannot be called anything other than kickass Valentine’s Day boxes with my mom. My brother and I killed the competition every single year. While I cannot remember exactly what all of them looked like I do recall a pink pig created out of an oatmeal canister. It was legit from the tail to the face. My classmates ohh-ed and aahd, the over-competitive one (there is always one) hated me.
And this was done pre-Pinterest people…my mom was a creative mastermind.
When a paper came home stating that Jettie could bring in a Valentine box I nearly did a cartwheel. I asked her what she would like to make and of course she had a million really great ideas (insert grand 4 year old hand gesturing here).
I then asked “how about a kitty cat?” and she said “like my cake?” And I thought why not.
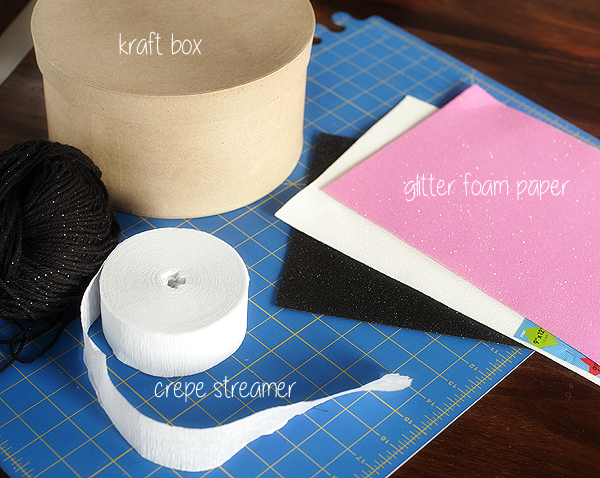 Here is what we used for our kitty cat:
- white crepe streamer
- round kraft box
- glitter foam paper in black, white and pink
- small piece of cardboard (for ears)
- glue gun and glue
- scissors
Steps:
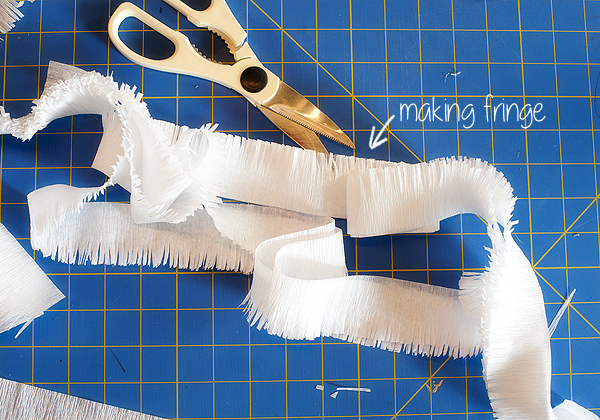
- Take the streamer and wrap around box once. Use this measurement to cut at least 15 lengths of streamer. Stack them and cut 1/8″ “fringe” along one of the sides, the entire length. So basically one half of your streamer will be fringed and the other half is in tact.
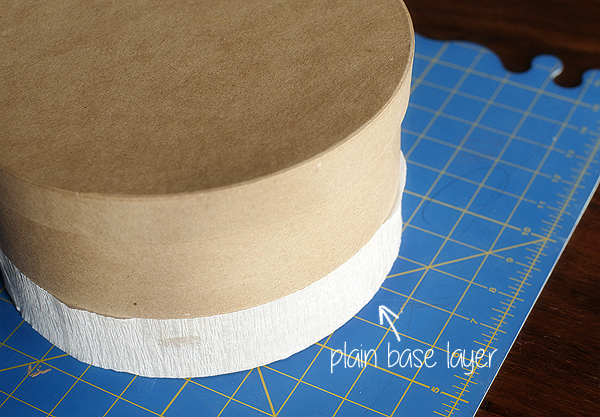
- Cut another streamer the length of the diameter of the box. Using a glue gun, secure that around the bottom of your box. This will be where you start your first row of fringe, you need this base layer to cover up the box underneath.
- Begin layering your fringe, securing to box with glue gun all the way around. The two ends of each layer should meet in the same spot for every layer, trim off excess after layer is secured. Go up as far as the lid will cover (I came about 1/2″ from the top).
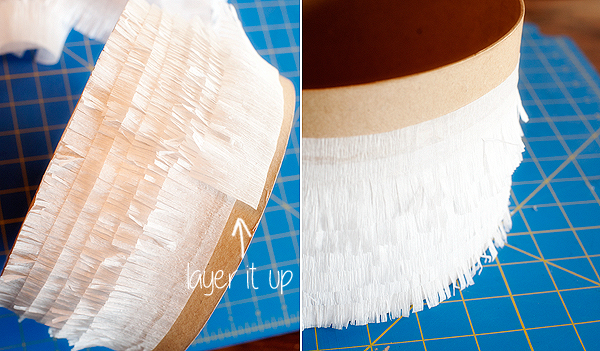
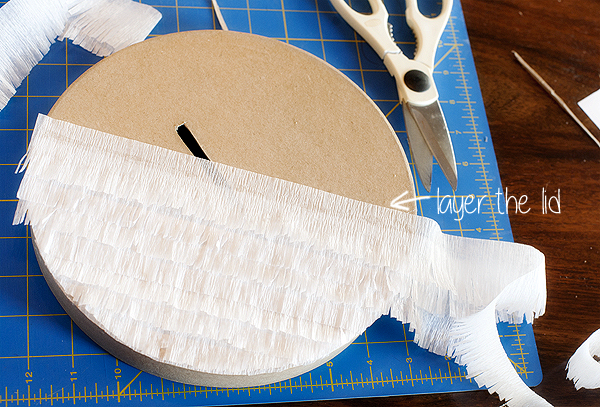
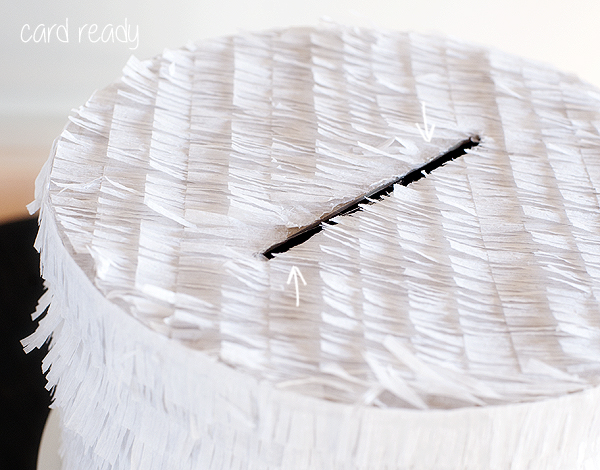
- Next cut a slot in the lid of your box for the cards to fit in. Then cover the lid with the same layer effect as the main part of the box (don’t forget the sides). Use a sharp exacto knife to recut the slot out (after being covered by the fringe). Use scissors to trim off excess fringe, also giving you that clean rounded edge.
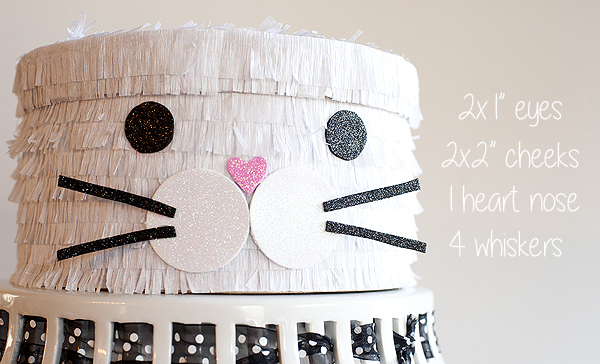
- Now for the face! We used circle cutters to make 2 eyes and 2 cheeks out of foam paper. I hand drew a heart for the nose (pink foam paper) and cut strips out of the black foam paper for the whiskers. We then attached them all with hot glue.
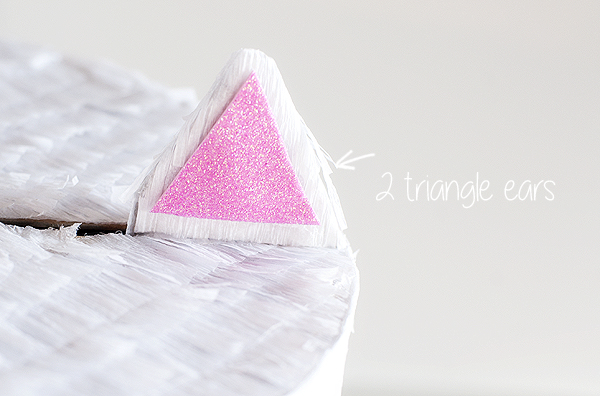
- For the ears cut out 2 triangles out of cardbard, and 2 smaller triangles out of the pink foam paper. Cover the cardboard with fringe and then attach pink triangles with hot glue. Attach to kitty cat with hot glue. (Be sure the triangles do not cover any of the slot.)
Done!
We still have yet to decide where to put her name, we are thinking on top towards the back. Jettie wanted to put it on the bottom – a minimalist. The apple does not fall far I tell ya.
You however should feel free to get creative by switching up colors, adding more decor or even a tail. I also think a fox head would be darling like this. Or a pink penguin. Maybe even a raccoon. I want to make more…
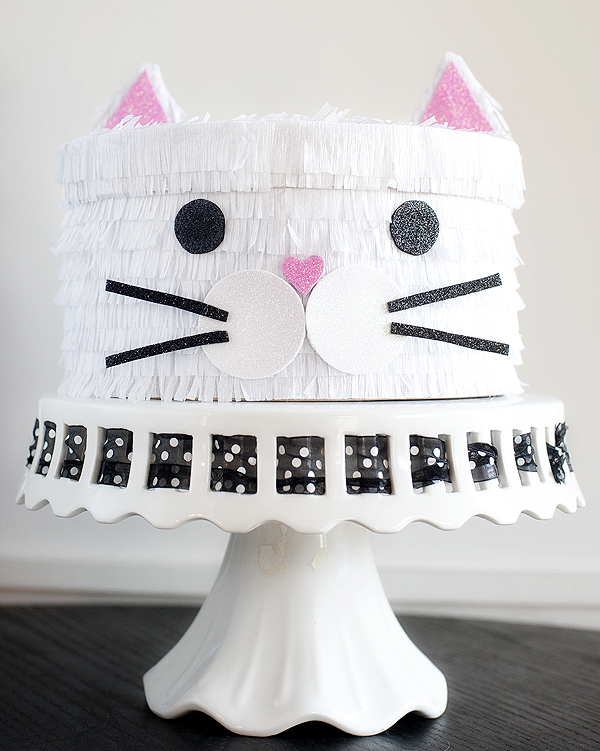 There is now doubt that this is one cute kitty cat Valentine box. While I am no “my mom” I do think she would be proud of this creation. Brings back the best kind of memories for me and hopefully will for my Sketts.
xo,


Pingback: Adorable! 18 DIY Valentine Boxes to Make – Couponista Queen ~ Coupons, Deals, Freebies, Frugal Living
Pingback: DIY Valentine Mailbox Ideas
Pingback: 42 WOW-worthy Valentine Box Ideas They Won't Forget - Dodo Burd
Pingback: 42 WOW-worthy Valentine Box Ideas They Won't Forget - Dodo Burd
Pingback: Valentines Box Ideas
Pingback: 100 Best Valentine Box Ideas - Prudent Penny Pincher