The tease has gotten a bad name for itself. But if you ask me- it’s something every girl needs in her arsenal. It doesn’t have to mean sky-high hair, or leave you looking like a block head. A good tease can be used to add subtle volume, be the base of your up-do, and aid in making your thrown together pony tail look a bit more polished.
Here are some products that will help you get started:
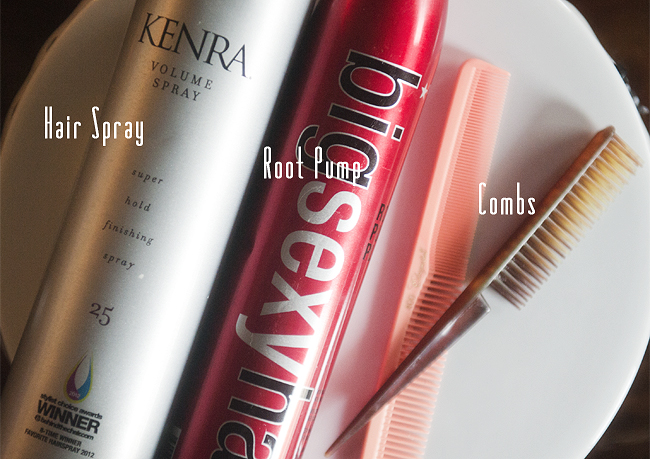 A good base product is essential- such as Big Sexy Hair Root Pump. Apply to your scalp before blow drying to add hold and volume. If Big Sexy is too heavy for your hair or leaves you feeling greasy, try an all over product, like Aveda’s Phomollient. (Feeling really ambitious? Use them both.) You will also need a regular comb, and a teasing comb that will make your job really easy. The teasing comb pictured above was found at Cosmo Prof a few years ago and my absolute favorite- but they make a few different kinds, like this, this, and this. And of course, a strong hold hairspray will help as well.
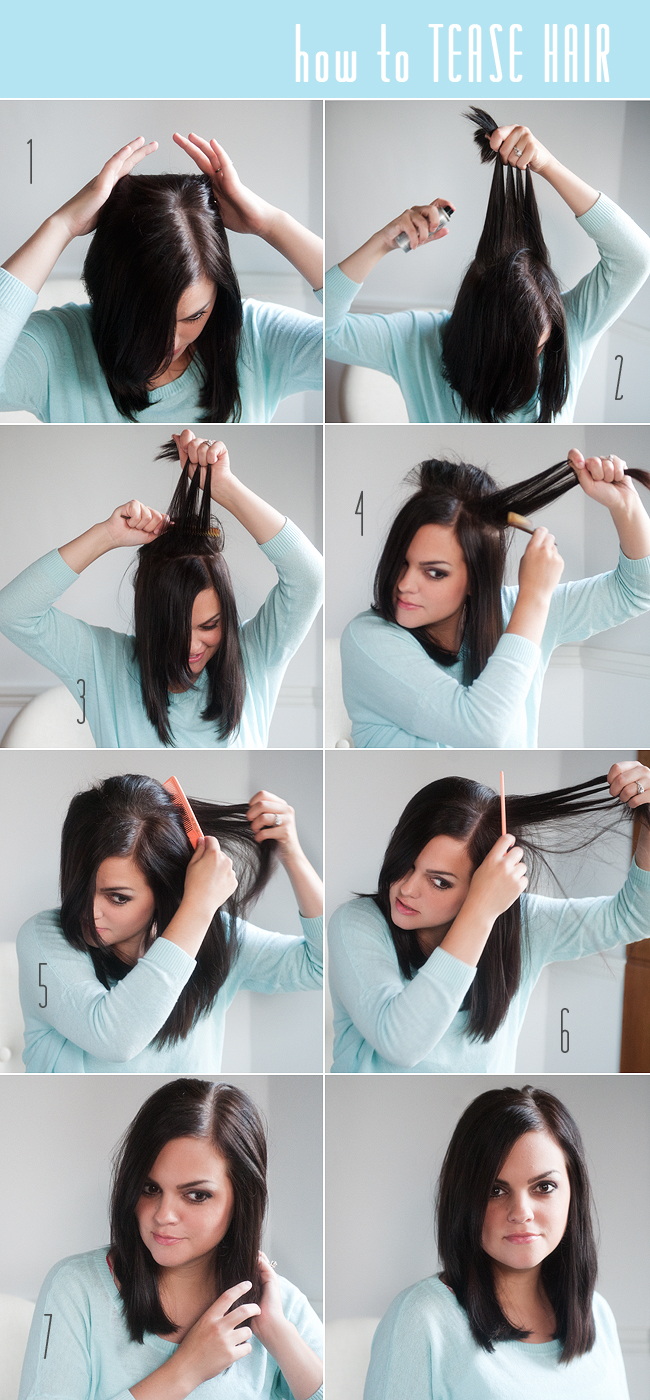
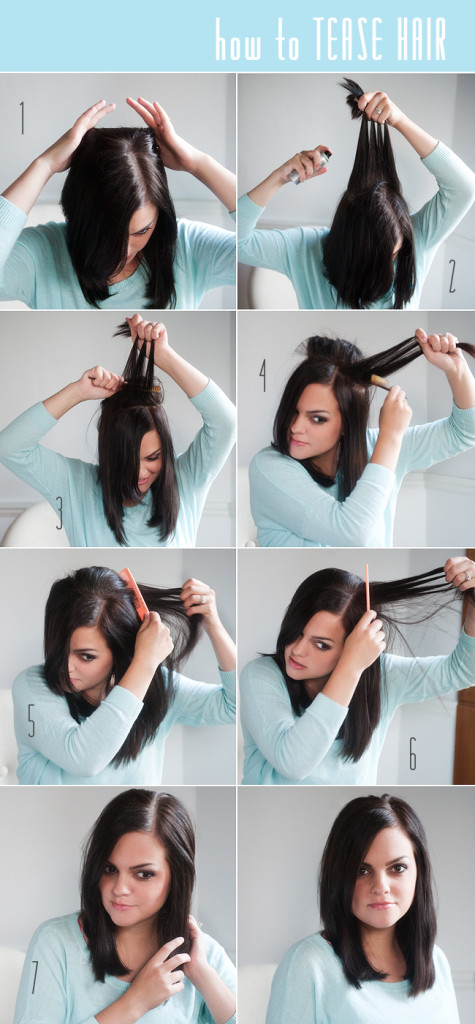 1. Following your parietal ridge of your head (the bones you can feel when you make a “halo” motion around your scalp), bring a section of hair up with your fingers and hold it tightly above your head.
2. With your small section in hand, spray base area with strong hold spray so that the tease you are about to create holds.
3. Using single stroke motions, begin backcombing hair towards your scalp. If done correctly, your tease will easily brush out and not create tangles.
4. Using that ridge as your guide, work your way from back to front in small sections. Following the shape of your head helps prevent block-headedness. (No one wants to look like a block head!)
5. Once complete, use a regular comb to go back over and smooth down exposed hair, hiding the backcomb you have just created. How you are styling your hair decides how much you are combing out- so have that in mind as you are “taming”.
6. Touch up areas that need a bit of a tease where needed.
7. Apply any finishing products, and use fingers to style hair into place.
Like I mentioned before, knowing how to correctly tease will tremendously help with any hairstyle. Before creating a bun, tease the area that will be the base of the bun, and your bobby pins won’t move an inch! Most importantly, trust what works best for your own hair. If you need a boost, don’t be afraid of your comb!


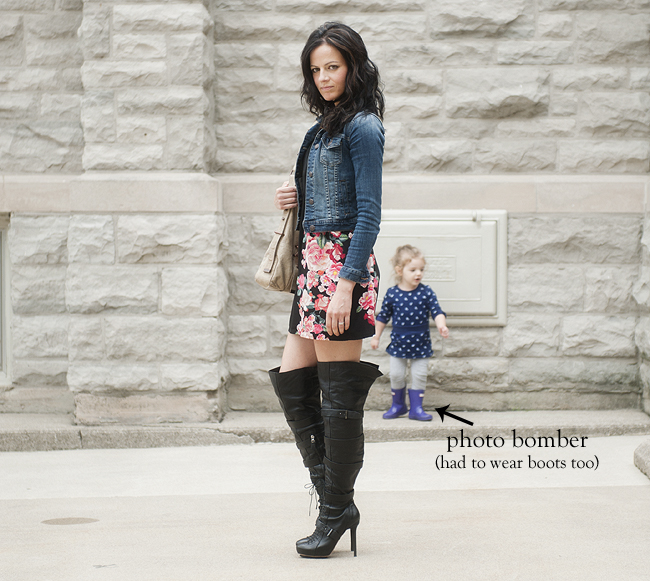
 If someone would have told me I would be sporting thigh high boots and a mini dress in a post at some point I probably would have assumed Pretty Woman for Halloween. That or Shan and I decided to get dressed up for the premier of 50 Shades. But for some reason this oh so short dress with the sky high boots work. I purchased the swing dress on clearance earlier this year thinking I would wear it as a tunic. The sales associate suggested I go up a size to make it longer and dress wearable. What she didn’t know is that I have a hard time finding a drape I love and I do really really love this drape. What I didn’t know is that I could wear it as a dress and only show a few inches of skin. Short and sweet with tall and tough – that is what this look says to me. If you are hesitant to try out this season’s “it” boot go grab yourself a breezy mini dress. You won’t be able to bend over (let’s face it, not all outfits are bend over appropriate) but you will feel pretty and a little scandalous.
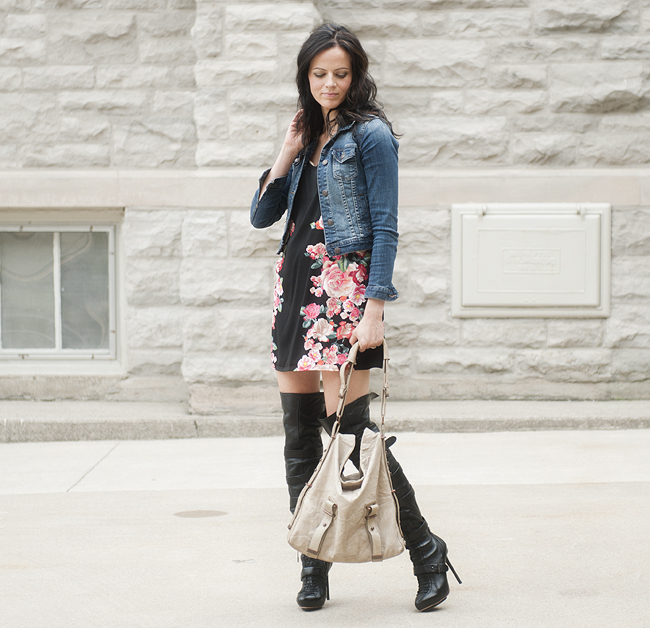
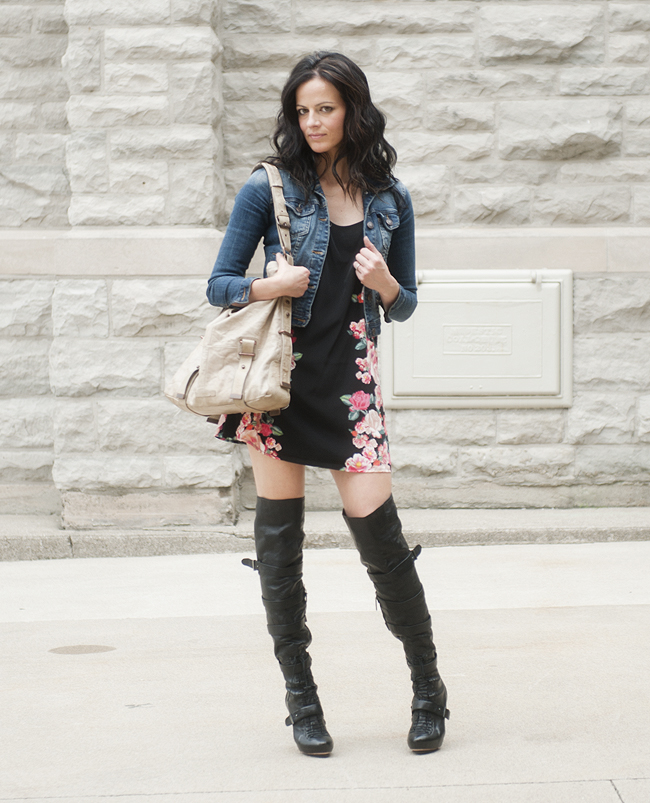
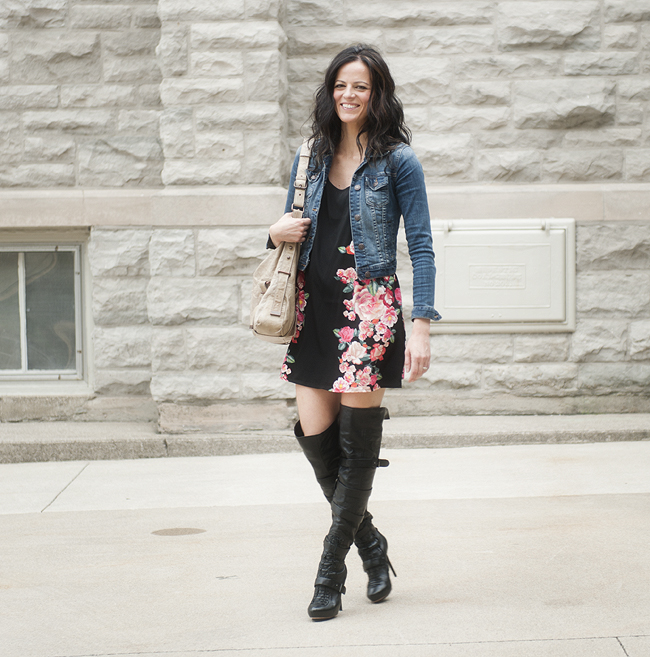
 |WEARING| thigh high boots similar/mirror image swing dress similar/Forever 21 denim jacket/stone tote similar