salted caramel-filled snickerdoodles

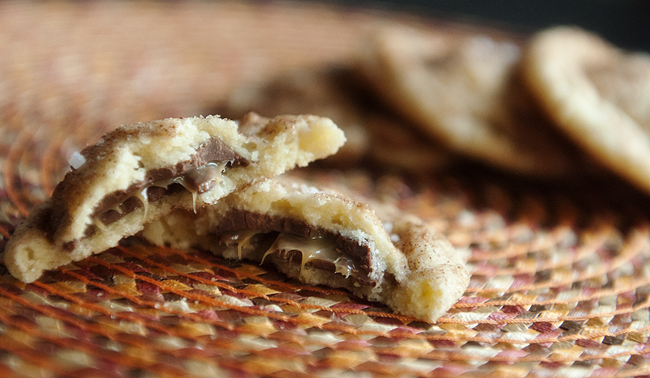
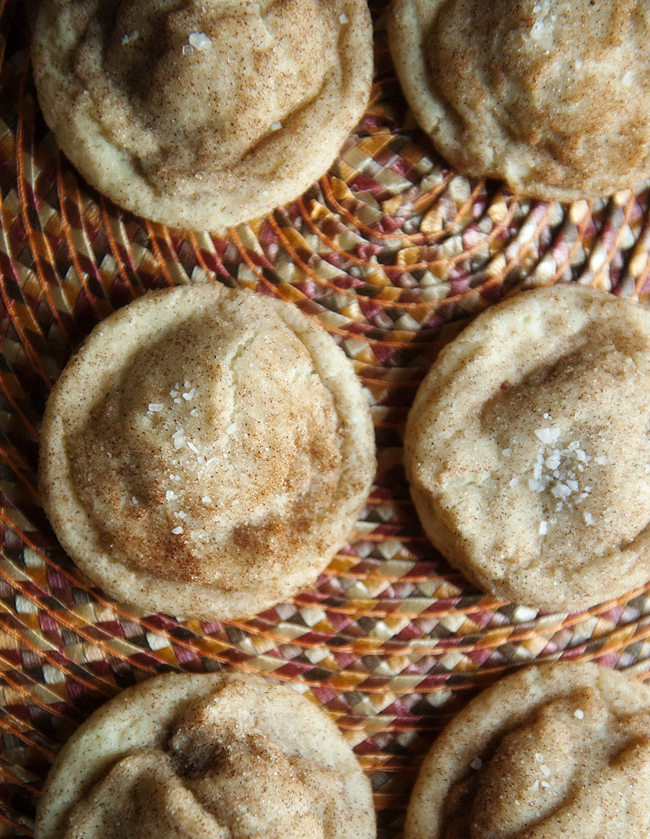
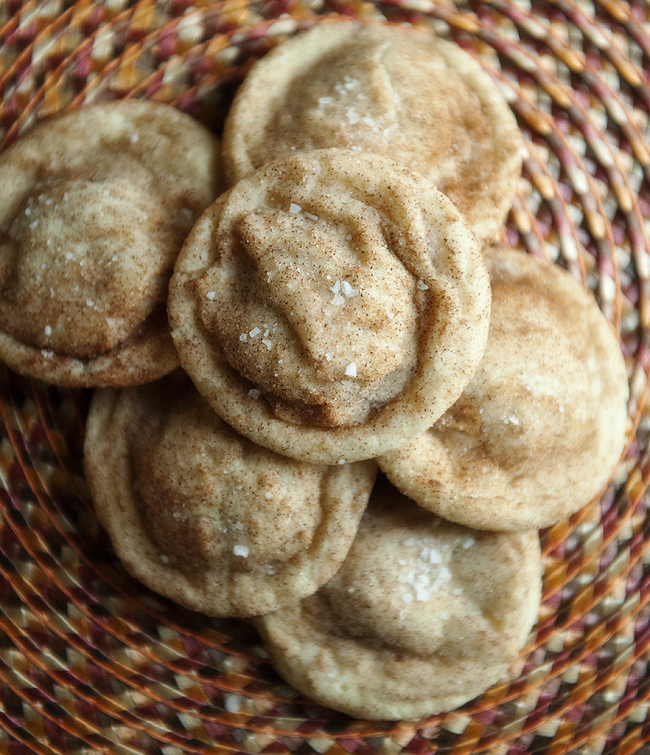
Anything that is “caramel filled” and I get along pretty well, if you haven’t noticed.  Add sea salt and you’ve got perfection, which is just what these too-easy-to-be-true cookies are.

caramel_snickerdoodle_5
As you know, I bake a lot of cookies.  Most of my recipes go through several “tests” before I put them in my shop (do they stay fresh for 5 days? are they thick enough? are they too similar to something I already offer?).  If they pass all of those tests, they are whisked off to a photo shoot with Brand and a new flavor is born.  What I love about baking for this blog is that those tests go out the window, and all that matters is that they are really stinkin’ good.

caramel_snickerdoodle_4

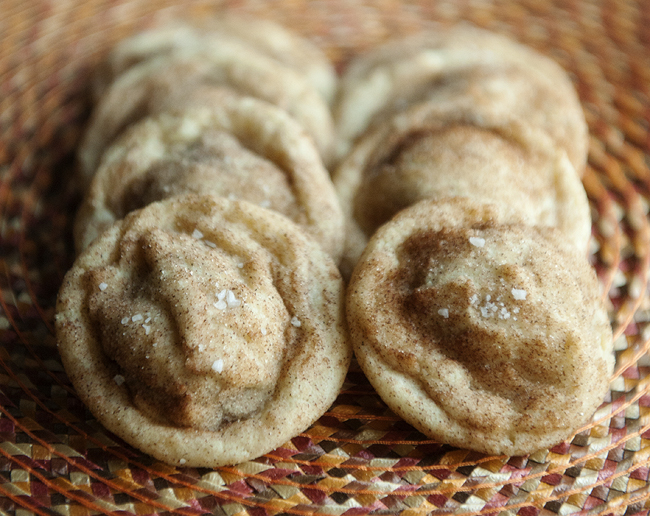
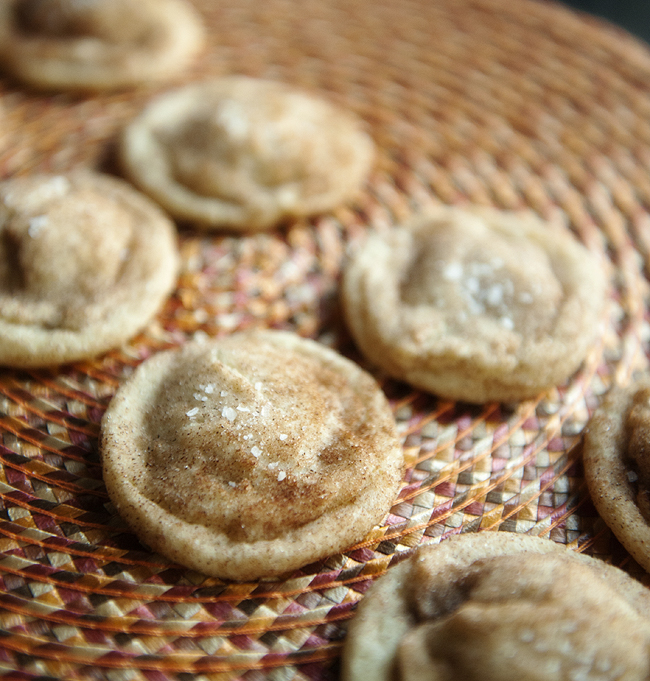
These came out of the oven and Josh says, “what are those??”. Ummmm, magical snickerdoodles, babe.  “Well… don’t you think they are kind of.. flattish?”  (This is Josh’s nice way of saying “those don’t pass the poof test”.)

caramel_snickerdoodle_2

You guys, in this moment I realized I have transformed him into a cookie snob, like myself.  Oops.

salted caramel-filled snickerdoodles
 
Ingredients
  • Topping:
  • ¼ cup granulated sugar, for cinnamon-sugar topping
  • 3 teaspoons cinnamon
  • Cookie:
  • 1½ cups granulated sugar
  • 1 cup (2 sticks) unsalted butter, softened
  • 2 large eggs
  • ¼ teaspoon vanilla
  • 2¾ cups all-purpose flour
  • 2 teaspoons cream of tartar
  • 1 teaspoon baking soda
  • ⅛ teaspoon salt
  • 35 chocolate covered caramel candies, such as Rolo or Dove
  • Coarse sea salt
Instructions
  1. Preheat oven to 375F. Line baking sheets with parchment paper and set aside. Using a small bowl, mix together your topping (cinnamon & sugar), and set that aside as well.
  2. In your mixing bowl, cream butter and sugar until light and fluffy. Beat eggs in one at a time, being sure to scrape down the bowl after each addition. Add in vanilla.
  3. In a separate bowl, whisk together the dry ingredients (flour, tartar, baking soda, salt). Using a wooden spoon, mix the wet ingredients into the dry, being careful to not overmix.
  4. Using a small ice-cream scoop or tablespoon, scoop dough out, adding a caramel to the center of each cookie. Roll in topping, and sprinkle with sea salt.
  5. Bake for 7-9 minutes, until small cracks appear of the top of the cookies. Let sit on cookie sheet for 5 minutes before transferring to cooling racks- and be sure to eat a warm one! So yummy!

My recipe was adapted from this recipe.

These may not pass the poof test, but one bite and I promise you wont care.  (The cookie connoisseur in my house didn’t at least!)

caramel_snickerdoodle_1
caramel_snickerdoodle_3
Happy Baking!
shansig

Posted in recipes, something sweet | Tagged | Leave a comment

diy cranberry mask

cranberry_mask_4

Nothing says the holidays like cranberries.  Sure they are yummy in sauces and crumbles but did you know they are also a fantastic beauty treatment for your skin?  Full of vitamin A & C, cranberries produce the ever important collagen that keeps your skin looking firm and healthy.  The anti-aging benefits do not stop there.  This super fruit fights free radicals which causes wrinkles.  And if that is enough for you they also aid in locking in moisture.  I have enjoyed all of our diy masks but I have to admit this one is my favorite.

cranberry_mask_1Ingredients:

  • 1 cup fresh or frozen cranberries
  • 1 cup red seedless grapes
  • 2 teaspoons fresh grapefruit juice
  • 1 envelope unflavored gelatin

cranberry_mask_2Directions:

  1. Rinse the cranberries and grapes, and then add all the ingredients to a blender and puree until they form a paste-like mixture.
  2. Cover the mixture and place in the refrigerator for 35 to 45 minutes to thicken.Remove and allow the mixture to sit at room temperature for about 10 minutes.
  3. Pull your hair away from your face and apply the mixture to clean skin.
  4. Find a spot where you can relax with the mask on your face for about 15 minutes (wear an old shirt or towel around your neck you would not mind staining if it should happen to drip). Gently wash off the mask with warm water, either in the shower or with a soft cloth.

*it is a good idea to test this on a spot under the arm before applying to face to ensure any sensitivity issues to the fruit.

mask from she knows

cranberry_mask_3My skin is still feeling soft and fresh from my first use of the mask last night.  This recipe makes enough for at least 4 applications, just be sure to let the other members of your household know it is for beauty, not eating with turkey.  Hope you pick up some extra cranberries and pamper yourself with this wonderful mask!

brandyjsig


Posted in beauty, diy, skin | Tagged | 1 Comment

cozy essentials

My week will be spent glued to my computer editing, designing, editing, designing and then editing, designing some more.  All this computer time means lots of hot cups of tea and the most comfortable clothes I can find.  These are my chilly day essentials – the must haves for curling up on the couch and sinking into a holiday movie (or holiday photography workflow):

cozy_essentials 1tunic hoodie 2oversized sweater dress 3hooded maxi cardigan 4shiny leggings 5plaid scarf 6cableknit hat 7over the knee socks 8sweatpants

brandyjsig


Posted in style, web love | Tagged | 1 Comment

diy wax paper

With the holidays at our doorstep, it’s time to start thinking about gifts.  This fun project puts a personal touch on something small; perfect for teachers, neighbors, the mailman, a party favor, a secret santa gift, a random act of kindness.  Where DIY wax paper is concerned, the projects are endless- but for this project a fresh batch of cookies was my chosen add-in.. because after all, who doesn’t love a fresh baked cookie?

wax_paper_envelopes_4

To begin, here’s what you will need:

scrapbook paper (thin paper works best!)

scissors

paraffin wax (paraffin is food safe!)

an old towel

an ironing board & iron

parchment paper

ribbon

wax_paper_envelopes_1

Okay, lets get started.  Set your iron to medium/low heat (depending on your iron), with your steam setting completely off.

While your iron is heating up, use a knife to chop your wax as fine as you can- the smaller the better.  Paraffin wax doesn’t crumble easily, so if needed place the pieces in a bag and use a hammer to get them a bit smaller.

Place your old towel over the ironing board to protect it from hot wax.  Cut a piece of parchment paper big enough to fit your scrapbook paper inside, with at about two inches left around the perimeter for overflow wax.

Place your parchment on the ironing board, and sprinkle some wax evenly across half of the paper.  Fold the parchment over, and use your iron to melt the wax inside.  Once melted, place your scrapbook paper inside the parchment that is now coated in wax, and run your iron over it again until you see the wax penetrate through the paper.

wax_paper_envelopes_2

Once you remove the paper, it only takes about a minute to dry. If the wax seems uneven, you can place it back in the parchment and heat again, or if you have way too much wax, get a new piece of parchment, place it, and iron again to remove the excess.

wax_paper_envelopes_3

When you are happy with the wax coat, cut your paper into an even square, and fold in the sides to form an envelope.  Use tape or a label to seal your wrapped cookie.  To make these extra special, here is a free printable!  

wax_paper_envelopes_7
wax_paper_envelopes_6
I love the endless options for these little gifts. Grab for any pretty print of paper, add fun ribbon and a tag, and you have an easy, memorable gift that won’t break the bank.

wax_paper_envelopes_5
Happy Friday!
shansig

Posted in diy, give a gift, holidays | Tagged | 2 Comments

looks good on paper

When we first bought this old house, its gorgeous walls were covered in parrots. That’s right. Brightly colored birds flying around the halls and stairways. It was at that point I decided I really loved wallpaper. Don’t get me wrong, I really hated the parrots, but I knew this house would look beautiful in a pattern that had a little more subtlety and a little less wing span. I looked for ways to integrate it without being overly patterned. Much to my surprise, the parrots came down quite easily. I picked a timeless pattern for my hall and that was that. With today’s wallpaper being so much easier to hang and remove, I knew I needed to sprinkle it throughout in more places than just a wall.

wallpaper_hutch_1

We have an old built in hutch in our dining space that was covered in a million layers of paint. The inside was slathered in an sparkly shade of gold. I thought this would be a perfect place to bring a fun pattern in, without being overly busy. A hutch, curio cabinet, or any cabinetry with open or glass shelving is an ideal place to bring pattern into your home without having to paper an entire wall. Not only is it a small and easy space to work with, but your cabinet items fill the space as well, allowing for practically any pattern that suits your fancy. Like this lovely afternoon bouquet.

wallpaper_hutch_2

I chose a more modern bloom pattern, that I thought would work well against the pure white hutch. I filled it with items I often use in my kitchen and absolutely love the way it turned out. The pop of color is just enough in the small space.

wallpaper_hutch_3

wallpaper_hutch_4

With a boost of confidence after seeing the hutch makeover, I took my paper trail a bit further. Where else can I sprinkle in some pattern? STEPS!

wallpaper_stairs_1I know what you’re thinking. How do you pick a pattern that you will love forever? Wallpaper is so permanent! Here’s my secret. You don’t have to. Not only has wallpaper made leaps and bounds in its hanging and removing ability, but now many companies make peel and stick wallpaper. This is exactly what I used for my stairs. I joined the masses with the ever popular chevron pattern and the peel and stick was just as easy to put up as it sounds on paper.

wallpaper_stairs_2

If you’re having trouble putting pen to paper on where in your home you can bring in some pattern, there are so many more options! When picking a pattern, I ordered samples. While, they didn’t make their way to my steps, hallway, or hutch, I do plan on framing their pretty patterns, and hanging in our living room among photos. You can paper accent tables, single accent walls, use it as book covers for display books, cover your canister sets in the kitchen, line your drawers, cover frames, lampshades, or even give those boring filing cabinets a new life.

One of my favorite wallpaper resources is Spoonflower. They allow you to upload your own pattern if you can’t find what you like and they will turn your print into whatever you wish. A wallpaper, an adhesive decal, fabric, or even wrapping paper!

So I am papering over all those cringing thoughts about wallpaper and its bad rap. It is truly a perfect way to add some glam in any space. The days of flowers and birds have flown the coop and pretty paper is here to stay.

lisasig


Posted in abode, diy | Tagged | Leave a comment