
Our friend (and Shan’s sister!) Brandy, showed us a trendy way to style our nails for spring. Going for a monochromatic look, she demonstrated how to create marble nails using shades of teal. A bit of a process, but simple enough that you won’t pull your hair out trying this fabulous technique!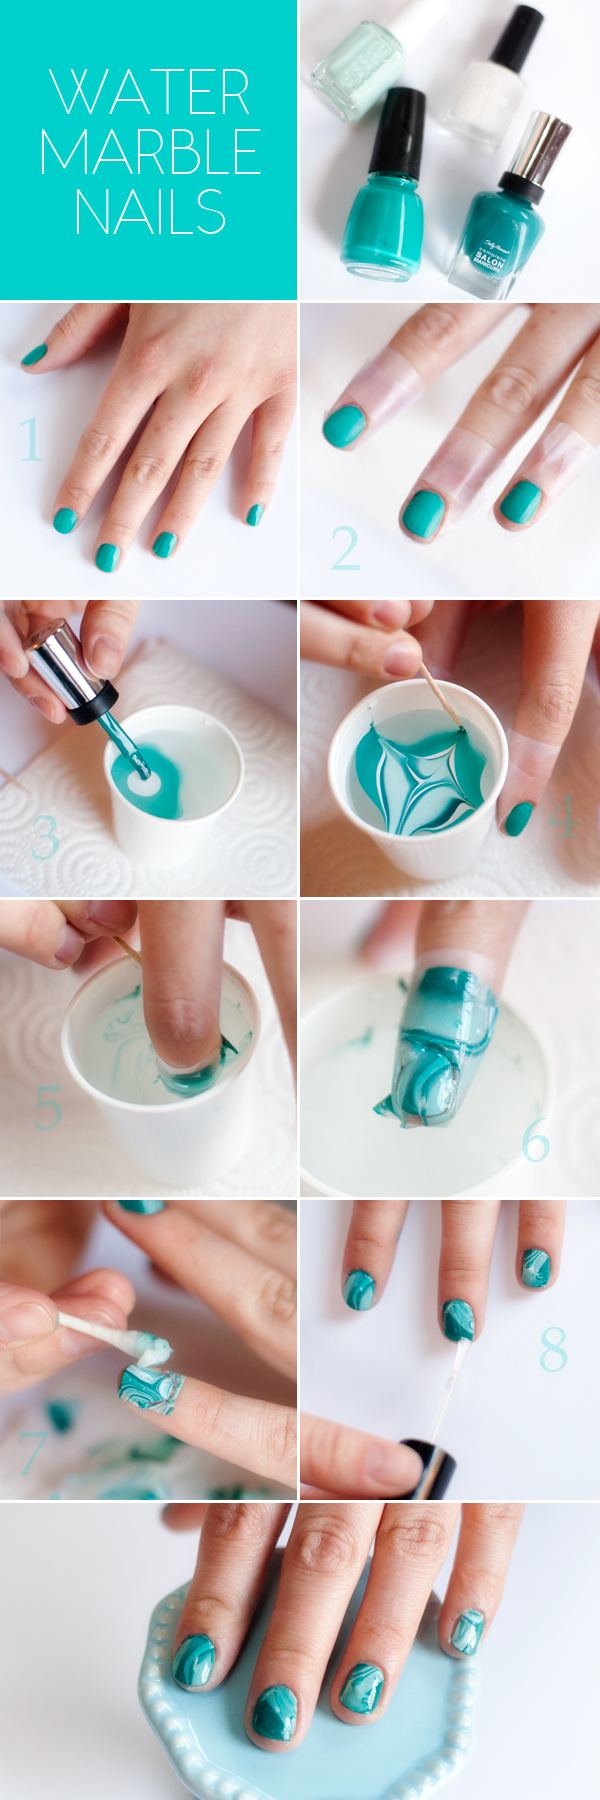
- Paint a base coat on nails in one of your chosen colors.
- Using an adhesive, such as scotch tape, seal skin around nails – this will make clean up much easier afterwards.
- Drop one color at a time into a throwaway cup filled with room temperature filtered water. Alternating the colors that contrast more will give you a bolder effect.
- Drag a toothpick through your colors creating a design (have fun with this!).
- Choose which part of the design you would like on your nail and dip at an angle. Take your toothpick and pull away excess polish keeping your design from being ruined.
- Remove the nail.
- Peel off tape and clean up edges using a Q-tip and nail polish remover.
- Seal with a top coat.
Sky is the limit as far as colors and design! We hope you enjoy this fantastic technique! We can’t thank Brandy enough (not to be confused with “brandy j” – you can count on seeing more of the j-less Brandy in the future).


2 Responses to water marble nail tutorial